The Assist and The Sashikomi
Introduction
Hello everyone – first time caller but a long time lurker of mahjong.guide. I thought for today I would like to introduce people to a topic called the Assist and also about its brother, the Sashikomi. A brief word of warning: this strategy is aimed at more intermediate players who are familiar with the basics, however all are welcome to read!What is an Assist and what is a Sashikomi?
- An assist is to purposely throw a tile to a player to advance their hand but not for them to win off it.
- A sashikomi is to purposely throw a tile to a player but for them to win off your tile. Think of it as “intentionally feeding” in game lingo.
The answer is yes and no. Yes, you want to win your hanchan (most of the time!), but to win, you might want to purposely feed another player!
Let’s look at a few examples.
Example 1:
In the first example, the dealer is in third place in South 4 and first place is around 30,000 points ahead. 2nd place has a triplet of and with an extremely low chance of hitting a yakuman. They choose to first assist with a
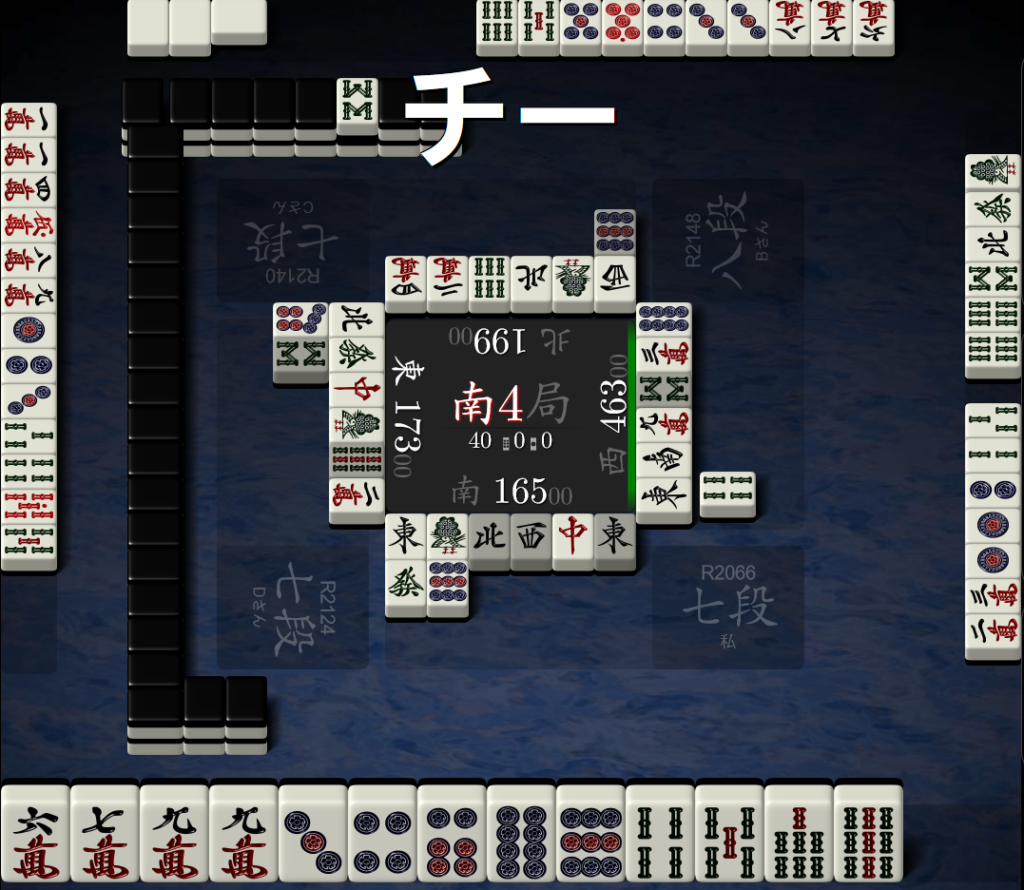
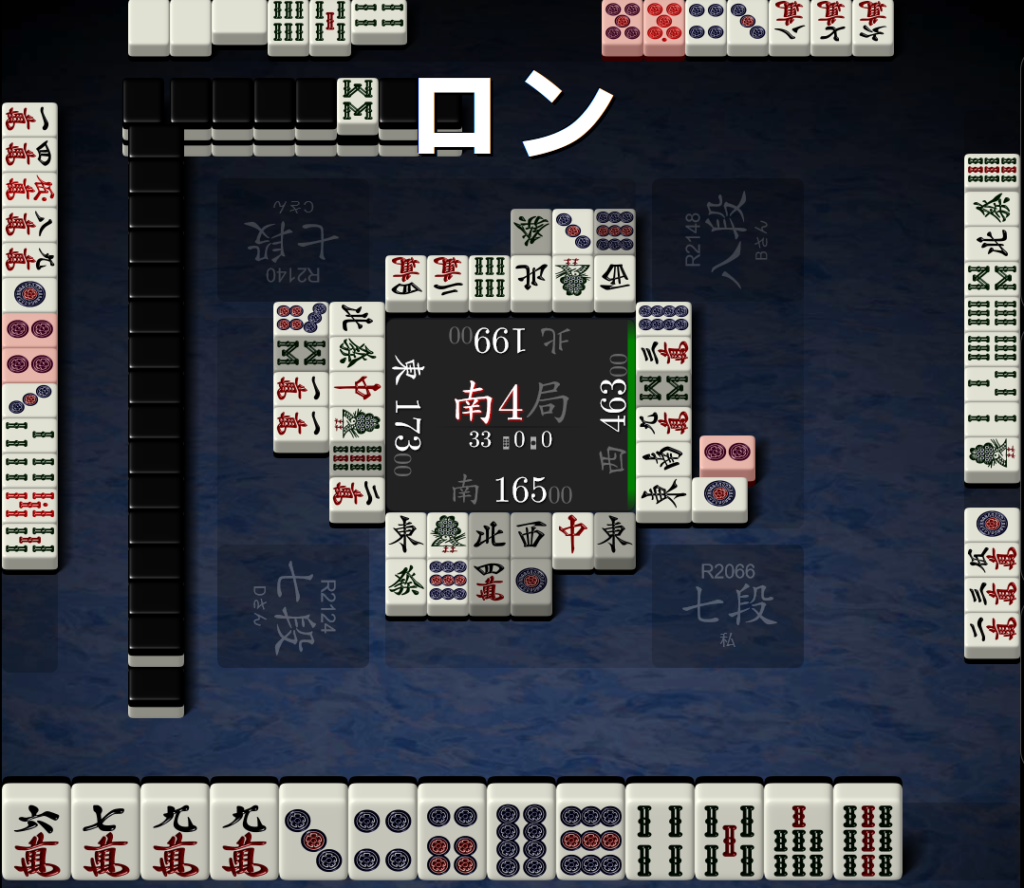
… and after seeing the
Example 2:
In the second example, the dealer is dead-last and first place is already too far ahead. In this situation, they would like to keep second place and so when the dealer declared chi on the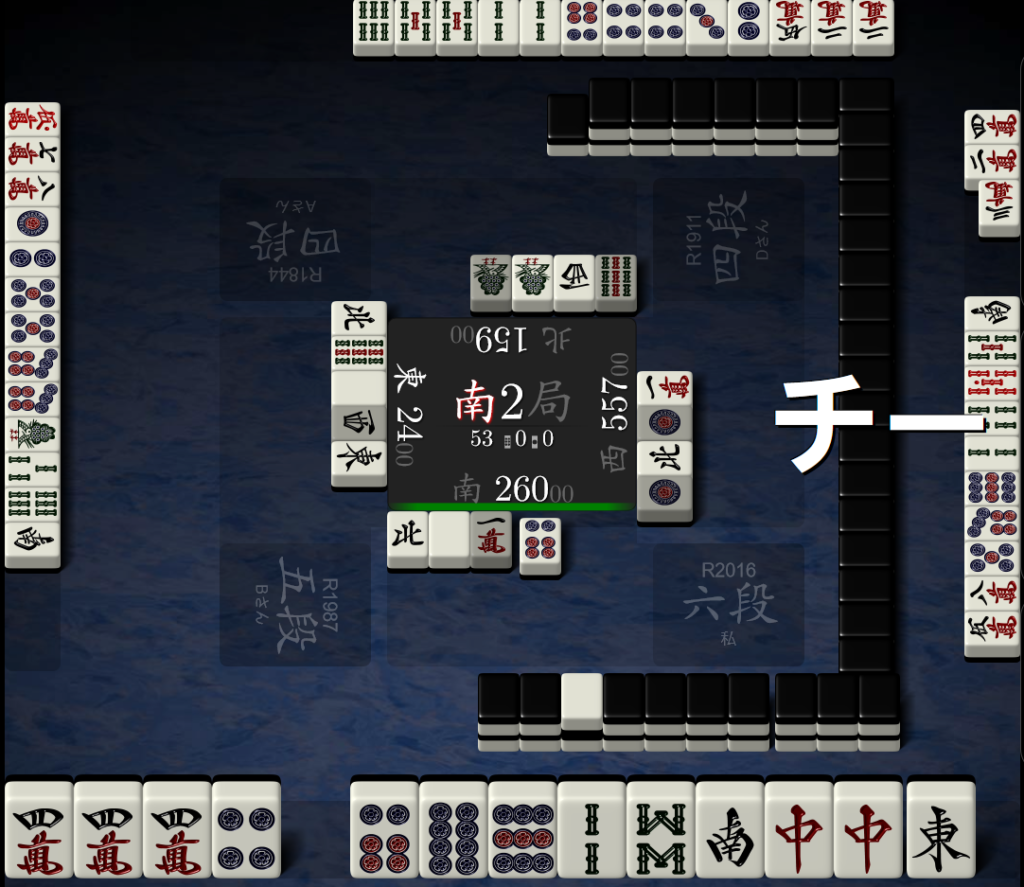
… and they continued to assist however did not succeed.
Unfortunately they went a bit too far as there is a chance for tanyao + 2/3 red fives which would put them close to third place. Once you’ve assisted enough, there is no need to sashikomi into a potential 3 han/4 han hand.
Example 3:
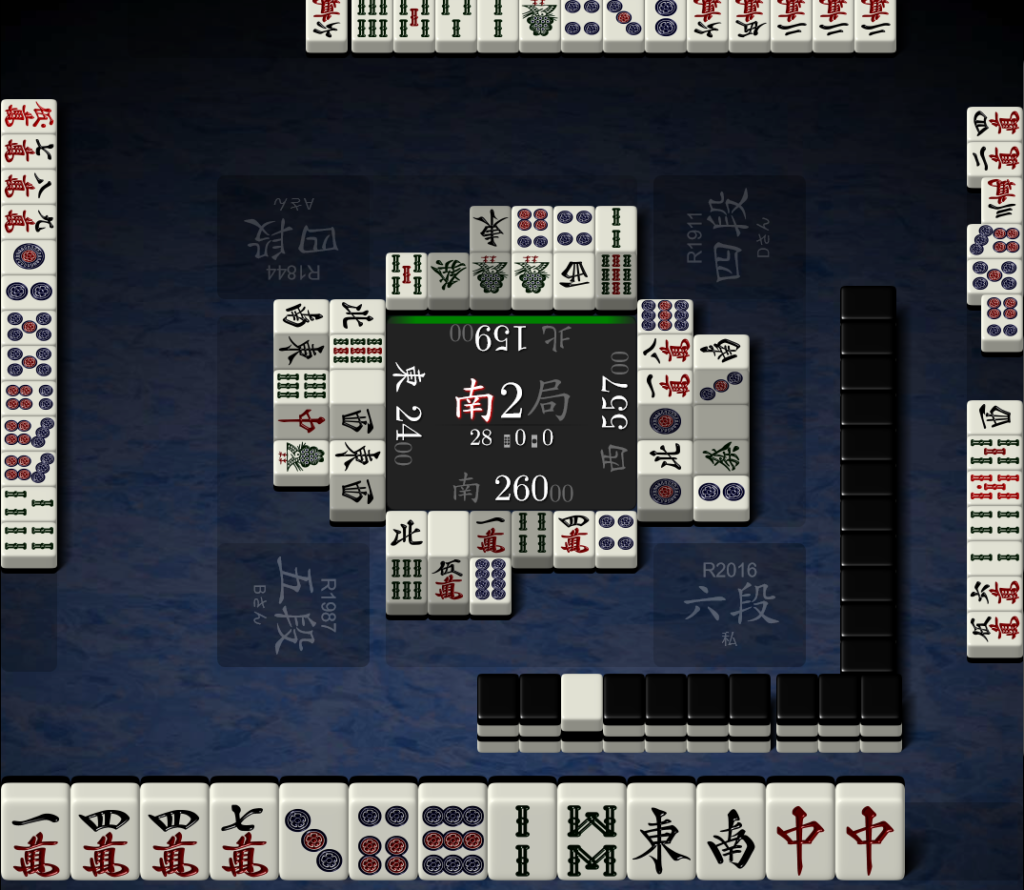
In the last example, the dealer is 2nd in South 4 and last place has declared riichi. First place is just over 18,000 points ahead of second place and decides to attempt a sashikomi into last place as it is unlikely going to be a sanbaiman or yakuman.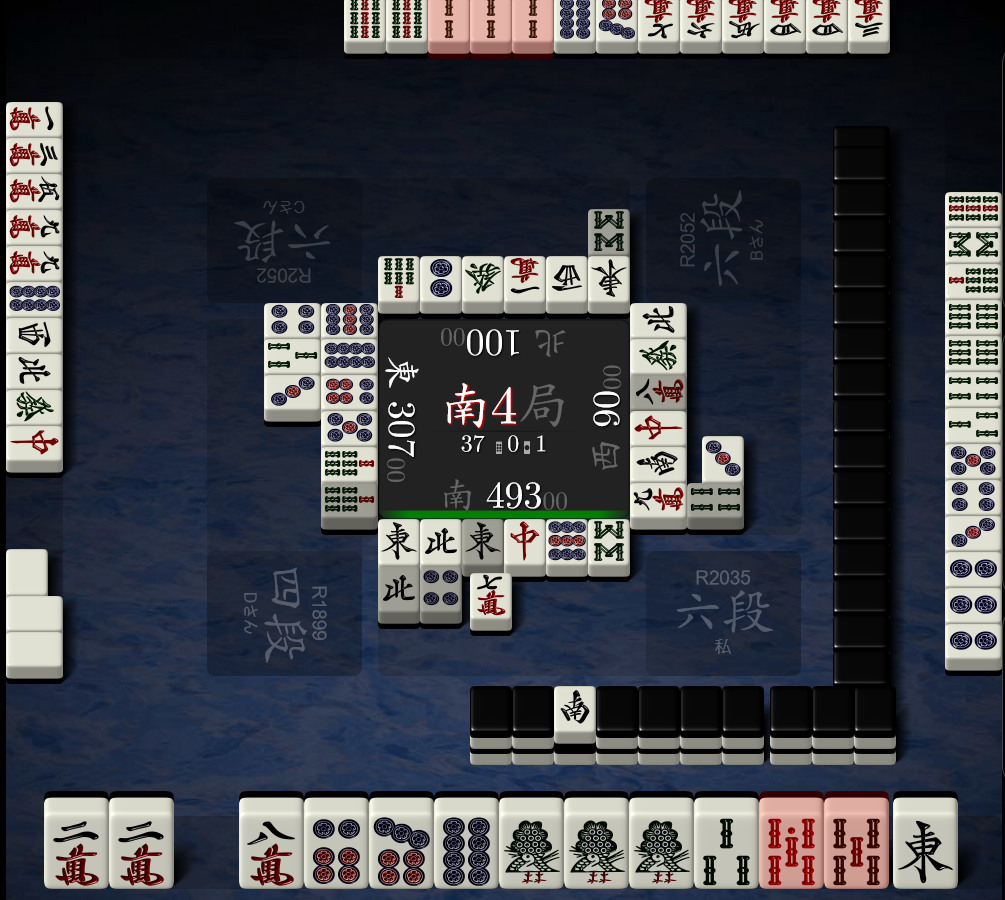
I would not have thrown the
And later on…

A perfect sashikomi! Avoids the ippatsu by throwing the East to escape the extremely low chance of the sanbaiman or yakuman, and feeds the ![]() which is safe against the dealer and against one of the riichis.
which is safe against the dealer and against one of the riichis.
A final bit of commentary. There is a fine line between an assist and a sashikomi, and an assist might turn out to be a sashikomi if you’re not careful. If you think you’ve assisted your opponent’s hand enough, there’s no need to mindlessly throw if you aren’t looking to purposely feed a win. There are plenty of chances it can backfire so use these techniques wisely!
‘Til next time.
Comments
its a great guide but the punctuation makes it very confusing to understand who is being talked about, particularly after a “.” when the text talks about a certain player then an action but the action is actually performed by other player referrenced before the “.”
Sorry, I should have been more careful when I first wrote it to distinguish between (to borrow from poker terminology) hero and other villains.
¡Qué buen artículo! Siempre me da nostalgia recordar estos episodios clásicos, especialmente con el doblaje latino original que es insuperable. Hoy en día puede ser difícil encontrar las primeras temporadas completas, sin enlaces caídos y en buena calidad HD. Para los que en los comentarios estén buscando dónde hacer una maratón de la serie, yo he estado usando este sitio: https://simpsonizados.co. Tienen todas las temporadas súper bien ordenadas. ¡Saludos!