A Guide to Tenhou’s HTML5 Client
Tenhou’s HTML/Mobile client has been out for a while now, though currently there are a lot of people who haven’t tried it and English documentation on how to navigate the client is pretty scarce, so here’s an article to explain in how to use it in a little more detail.
You can find Tenhou’s HTML client at http://tenhou.net/3 OR by selecting the Web版で開く (open web version) option from the normal splash screen at http://tenhou.net/0. If you’re on mobile, going to http://tenhou.net/0 and selecting アプリ版で開く (open app version), your phone will open Tenhou’s Android/iPhone app instead, which is by and large the same as the HTML Web version.
For those who are using a PC rather than a mobile device, there is a Chrome extension that translates the interface into English available to download. For mobile users or people who would prefer to use another browser, read on below!
(Note: As the client is still in development, some of the screenshots in the article might become outdated over time).
Introduction
Before we start, I would like to get this miscellaneous function out of the way first:
Because the HTML version is primarily built for phones, if you don’t do anything on the main screen for a while, it will automatically switch to power saving mode (found at http://tenhou.net/3/?powersave) and you have to press “BACK” to return to the normal client interface, so don’t be surprised when you are surprisingly kicked out of the normal lobby screen after a period of inactivity.

When you go to http://tenhou.net/3, you will be greeted with the image above. If it’s your first visit to the HTML client, chances are the ID field will contain “NoName” instead. Entering your usual ID from the Flash or Desktop client will work if you already have one. If you don’t, and you want to create an account on the HTML version, you have to type your desired username into the input field first, and then press 新規ID (New ID) and confirm your choice, which is the opposite order compared to the other versions. After you have confirmed your registration, an user ID will automatically be filled in the login field, representing your new username.
To the right of the username field, you can choose between male and female voice for the sound effects (男: Male, 女: Female).
You can also find a button that says ロビーの移動 (Switch lobby).
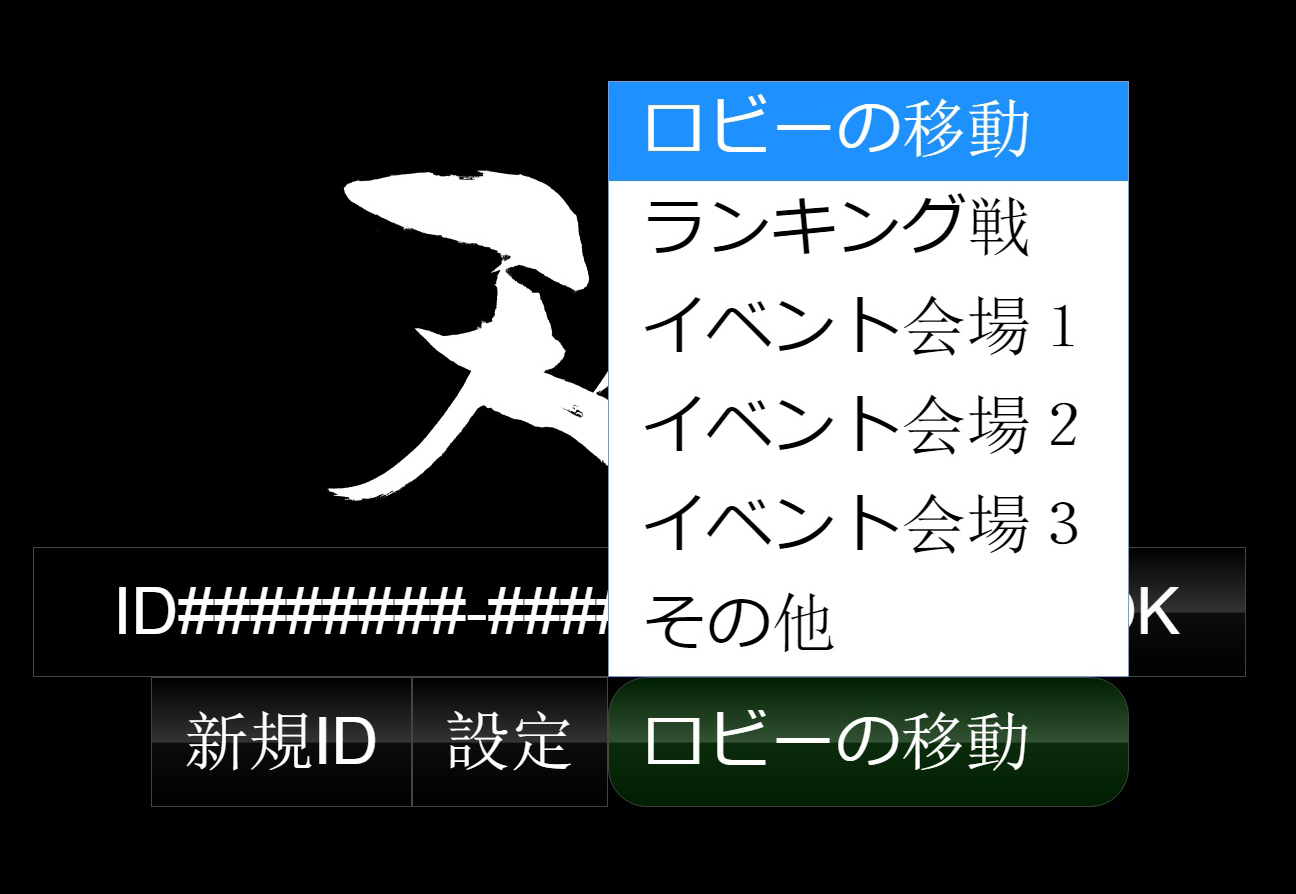
After clicking on it, you will be prompted with a few choices:
- ランキング戦 will lead you to L0 (default option when starting the client).
- イベント会場1/2/3 will lead you to Tenhou’s default championship lobbies (C00112233, C00223344, and C00334455 respectively).
- その他 (Others) will open up a prompt for you to insert the lobby number you want to go to, along with a hyperlink for you to create a new lobby if you want to.
Whenever you switch lobbies, there will be an indicator to the right of the Tenhou logo that tells you which lobby you’re logging into.
設定 (Settings) will open up the settings menu, which will be covered later in this article.
In-lobby interface
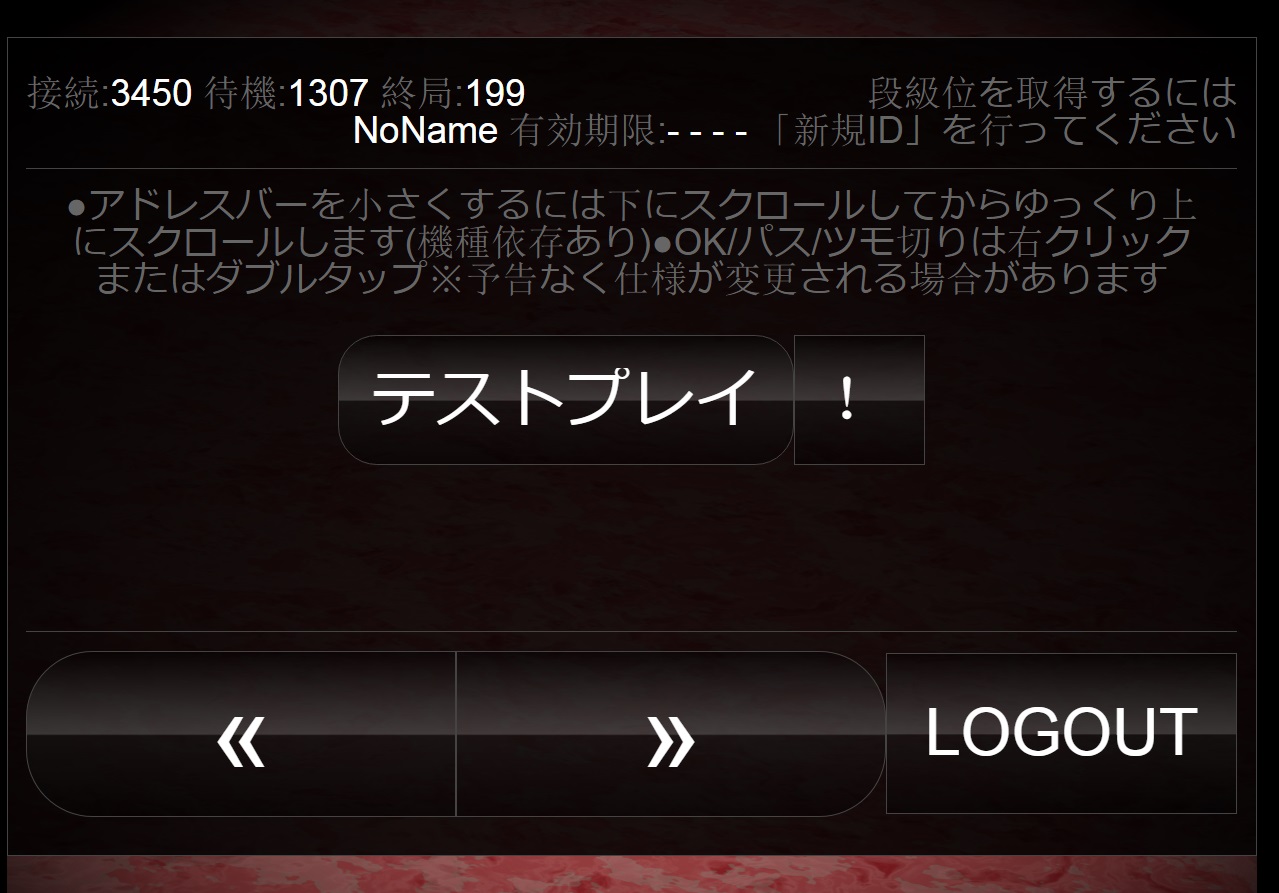
The first thing you see will be the “Test play” button with a “!” button next to it. The “!” button will show you an image of how the game looks on the device you’re using. Pressing “Test play” and selecting the corresponding option will plunge you into a game with 3 (or 2) auto-discard bots to test the client.
You can also see “<>” and “LOGOUT”. The arrows are used to cycle through the interface while “LOGOUT” will log you out, of course. For the purpose of this article, I’m always going to cycle to the right using “>>” to introduce the functions.

After cycling to the right once, you will see three “SELECT GAME” prompts with three queue buttons. Press on “SELECT GAME” to select the gamemode you want to play and then queue for a game. This screen supports three gamemodes for quick selecting in case you like to play many types of games.
The arrow buttons are now replaced with 対戦 (Match), but they still function as normal. Cycle to the right to go to the next section of the guide.
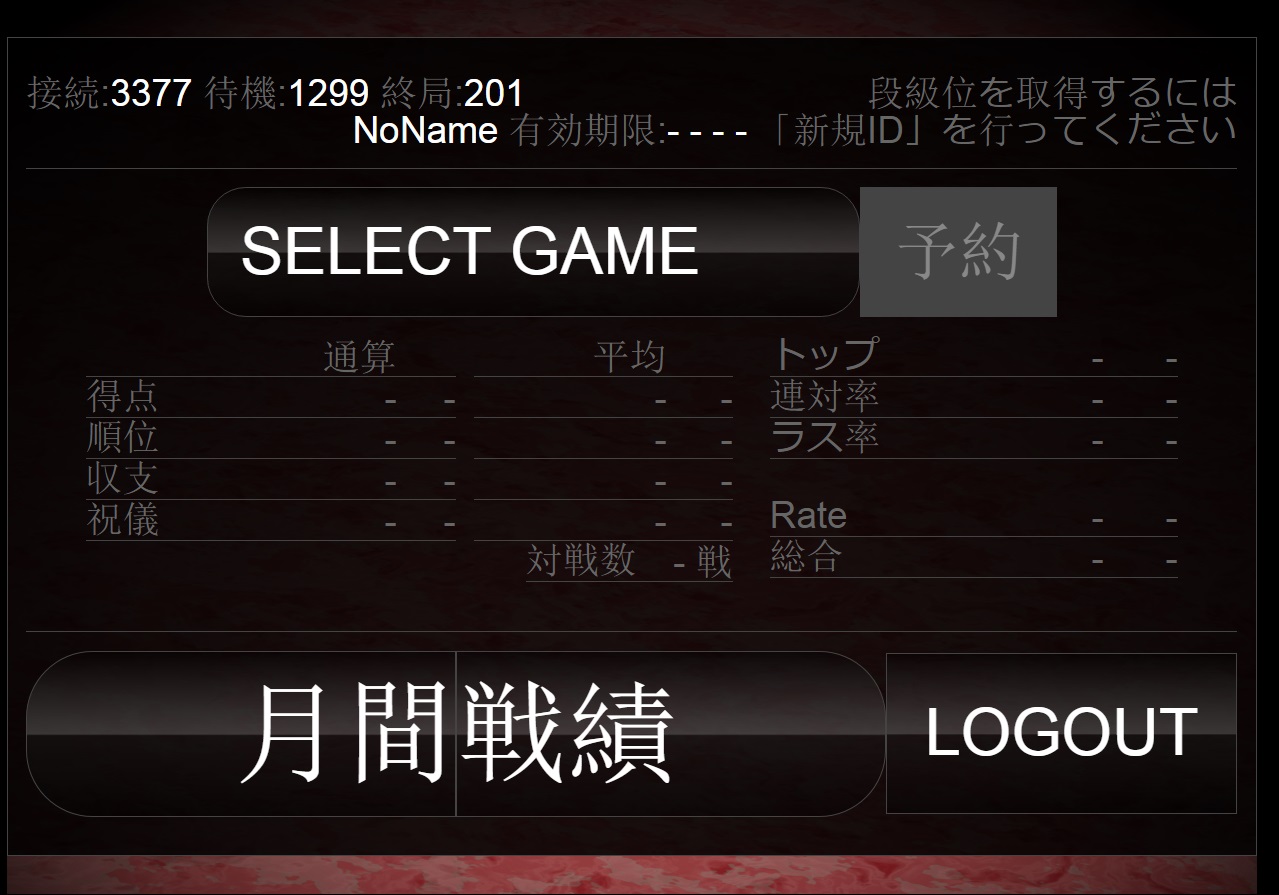
The buttons have changed to 月間戦績 (Monthly stats). This screen will show the monthly stats for the game you select with “SELECT GAME”. A queue button is also supported.
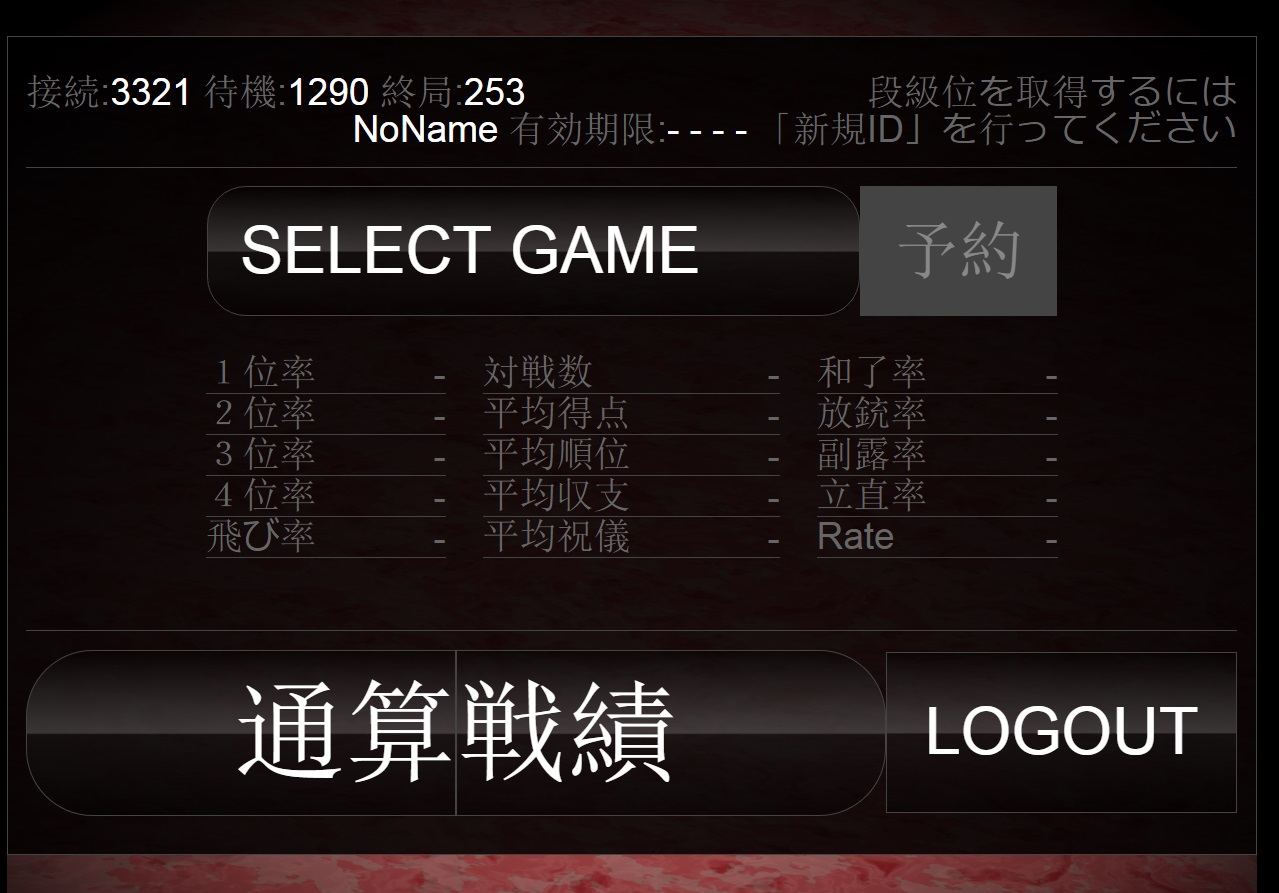
If you cycle to the right again, the buttons will change to 通算戦績 (Total stats). This screen works in the same way as the screen with monthly stats.
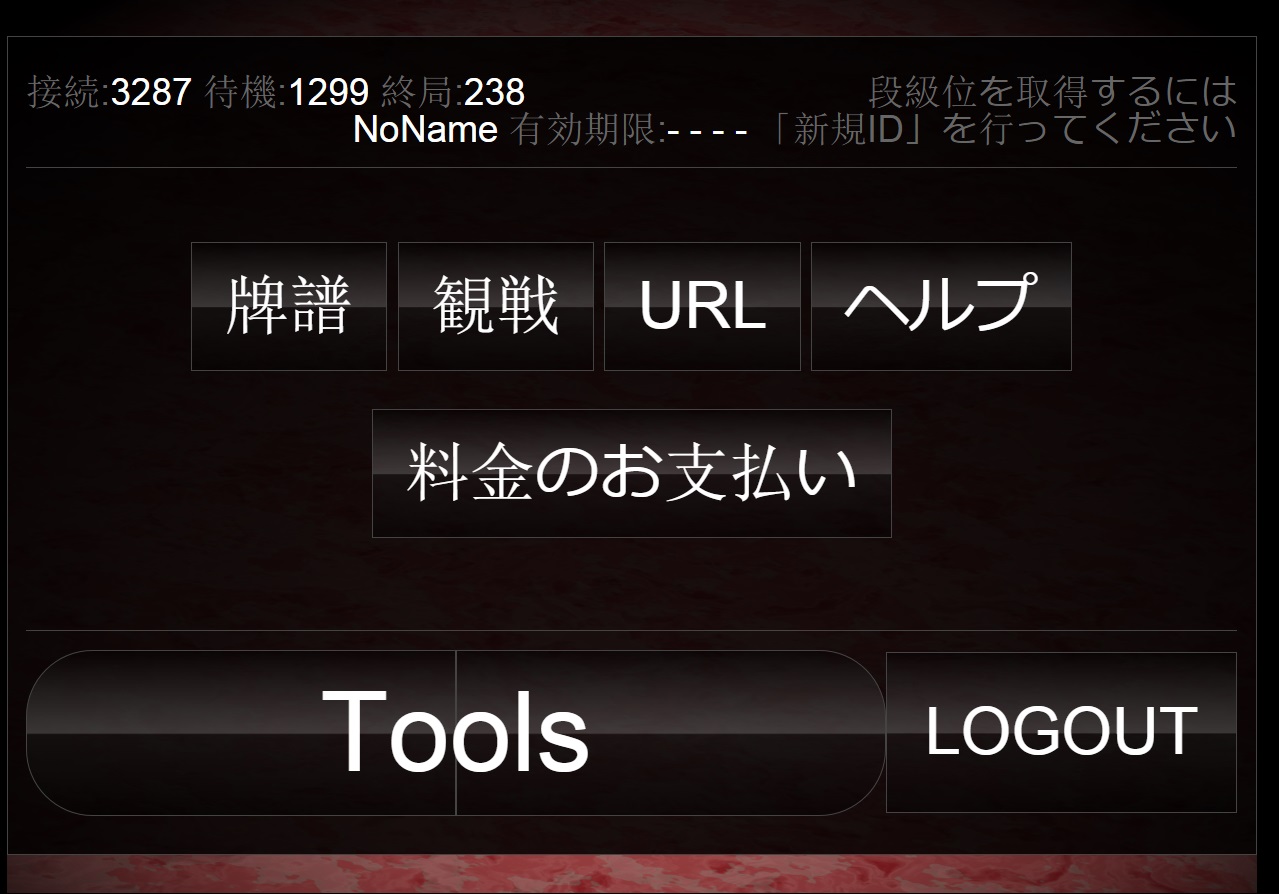
Cycling right again to the final screen, you will be shown “Tools” with a few options:
- 牌譜 (Logs): You will see a screen which shows your game logs. On PC, right click on a log and open the link in a new tab will return the log in a normal format.
- 観戦 (Spectate): You will see a list of games you can spectate
- URL: Enter a tenhou log/spectate URL here to render it in the HTML client
- ヘルプ: Redirects you to http://tenhou.net/man
- 料金のお支払い: Redirects you to the payment page for premium membership.
Settings:
This section will describe the exact options in the settings menu mentioned in the first part of the article.
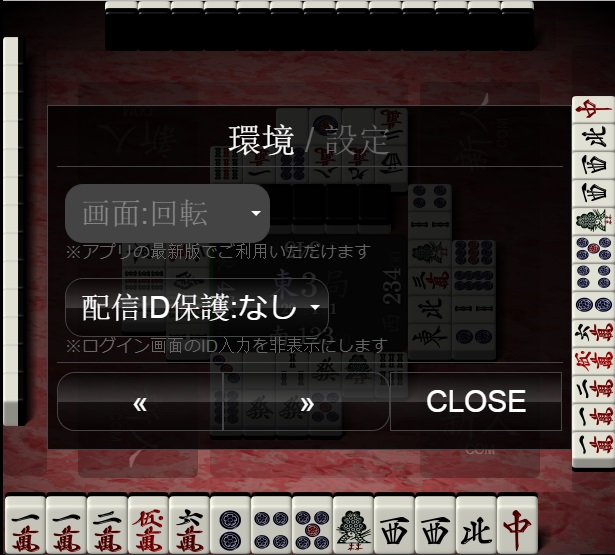
For the interface settings, if you are using this client on PC, the first setting will be grayed out as it switches the app’s orientation setting when you are playing on a mobile device (Three choices of automatic, always vertical and always horizontal).
The second line is for whether you want Tenhou to censor your ID display on the home screen as ID########-######## (this setting is on “No” by default).
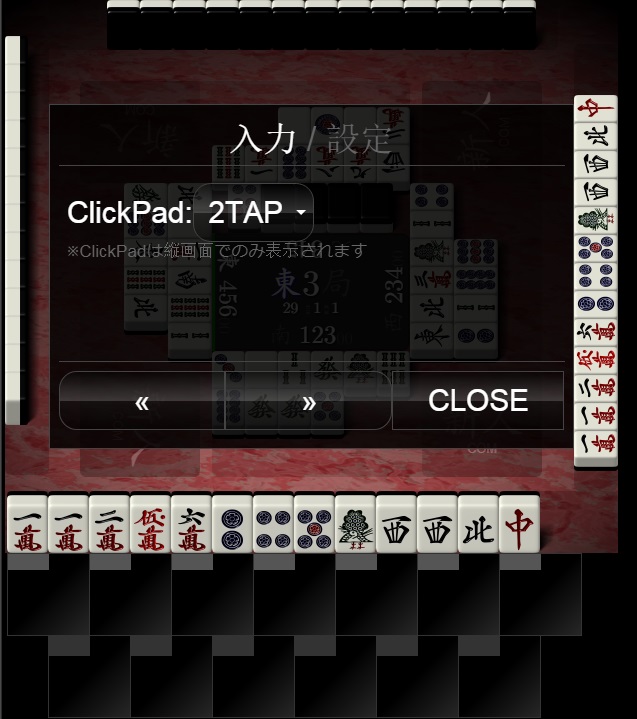
After you cycle to the right once, you’ll be greeted by “ClickPad” settings. This is primarily for phone users, as it affects how the extra tile discarding method will work (denoted by the lower part of the screen on the image, this is not always available unless you are in “vertical mode”). “2TAP” creates a more precise tapping area and “3TAP” creates a sliding mechanism to choose tiles.
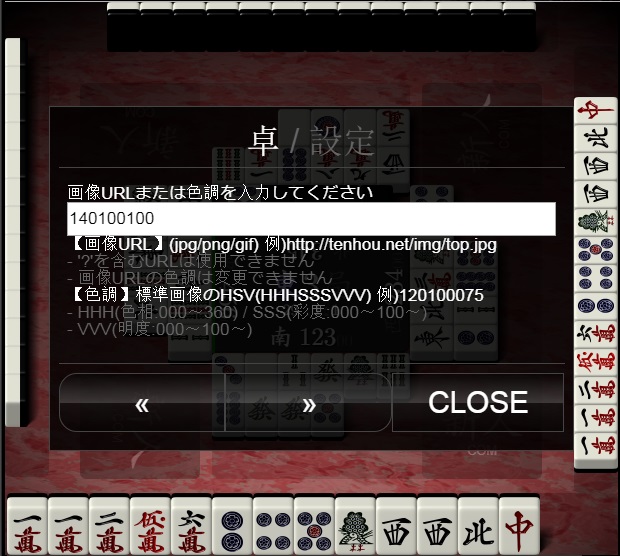
Here, Tenhou allows you to change your table background. Input your preferred color’s corresponding HSV value to change the background color to the color you want it to have. If you just want a different background altogether, you can also link to an image and put it in the input prompt.
Also in table settings (cycle to the right again) is the option to switch physical wall rendering off/on while you play/watch replays (off by default). Last but not least, cycle to the right again for a final input prompt. Input a RGB Hex code here to change the tiles’ back color.
And that’s it for using the HTML5 client!