Replay Review #5
Today’s replay review will be a little different – I’ll be walking through one of my own recent games and providing commentary on my own choices and thought processes. You can view the replay for yourself here.
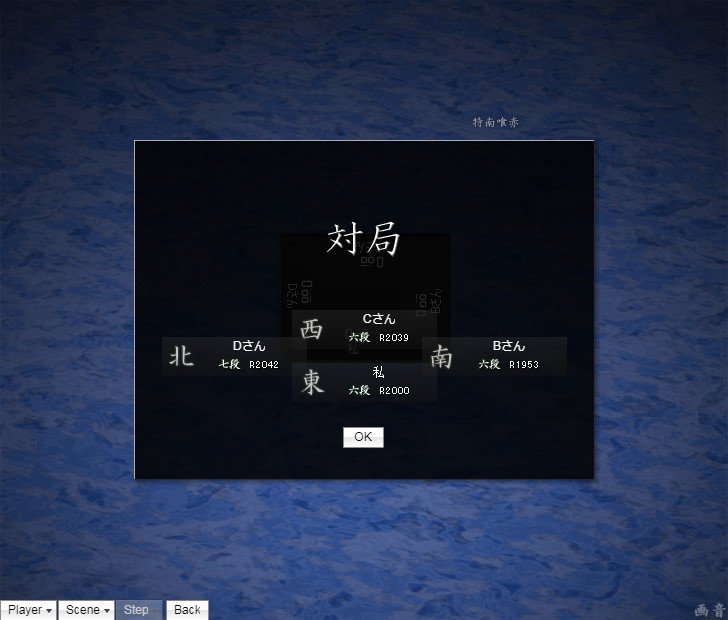
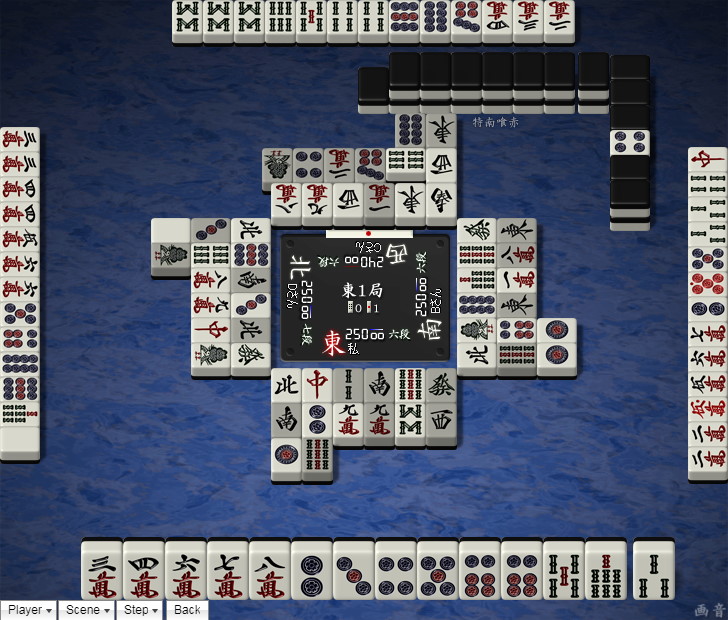
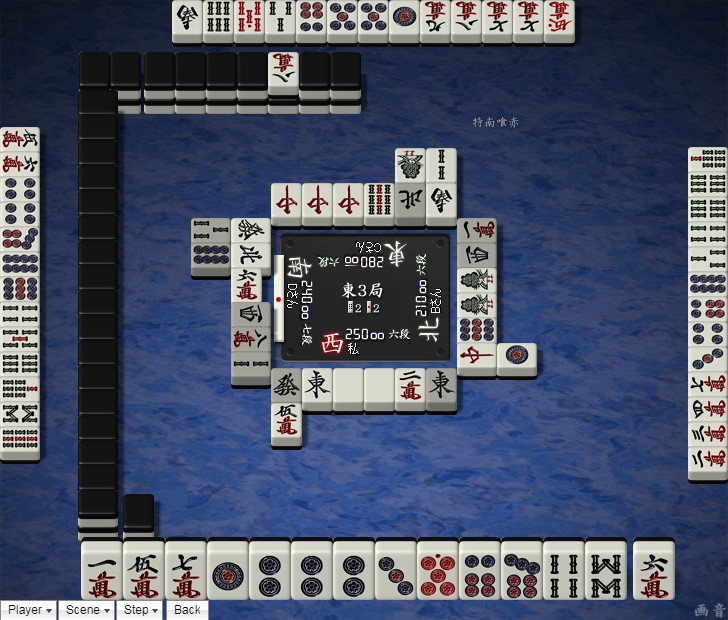
With three 6d and a 7d (what’s he doing in tokujou?), all with fairly high R, we can expect a tough fight. There’s no room to underestimate my opponents, so I’d better focus. It’s unfortunate that the 7d is to my left, as it means he’ll be able to avoid feeding me useful tiles to chii. I’d also rather not be first dealer, since that means the pressure is on to strike first and set the tone for the rest of the game.
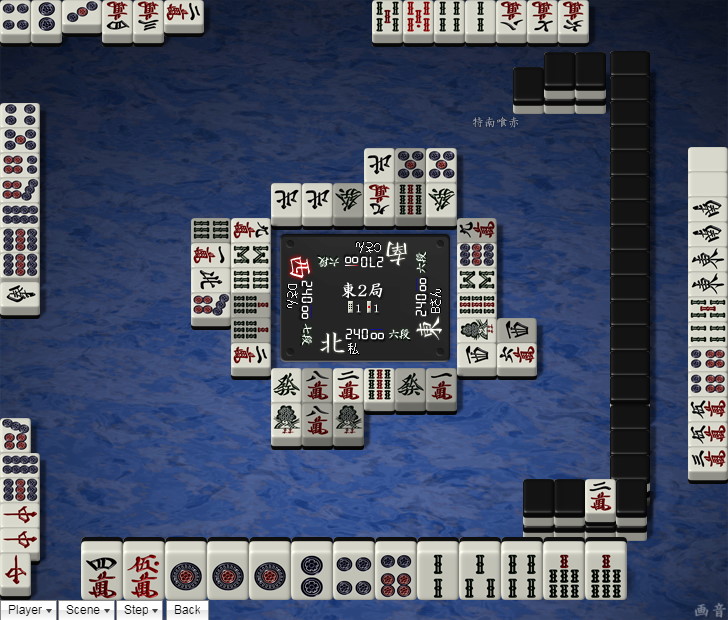
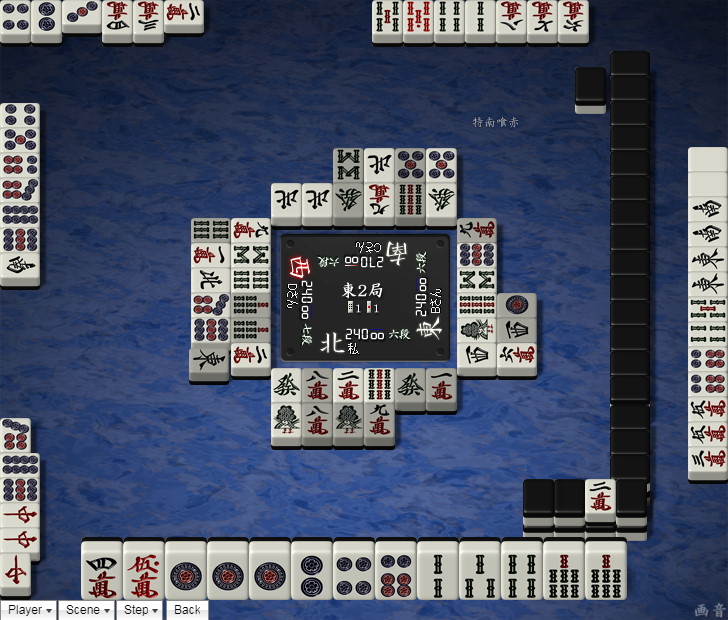
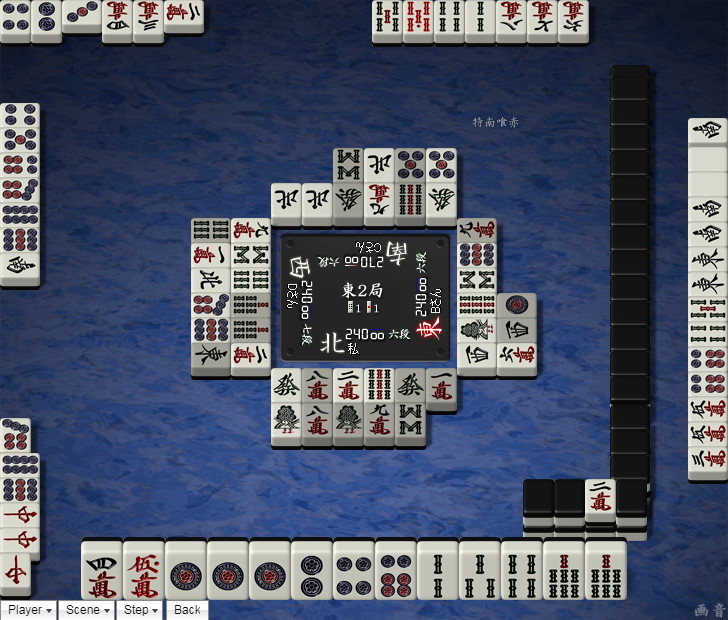
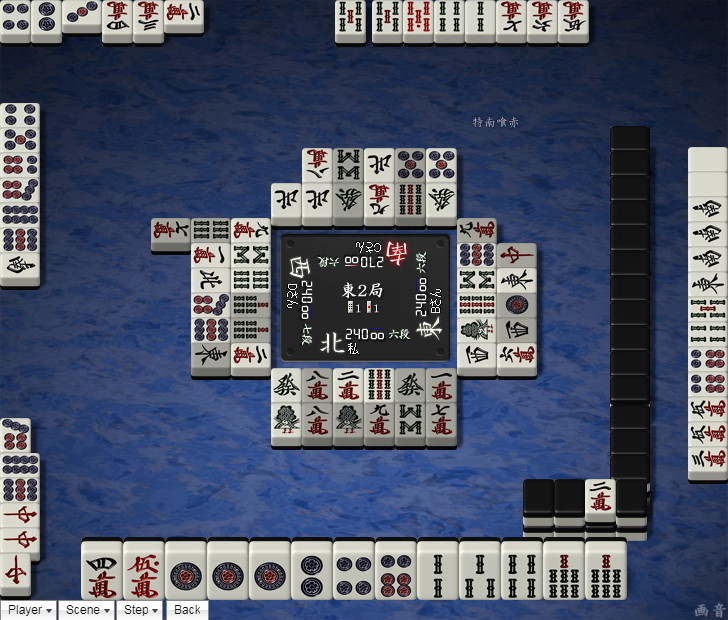
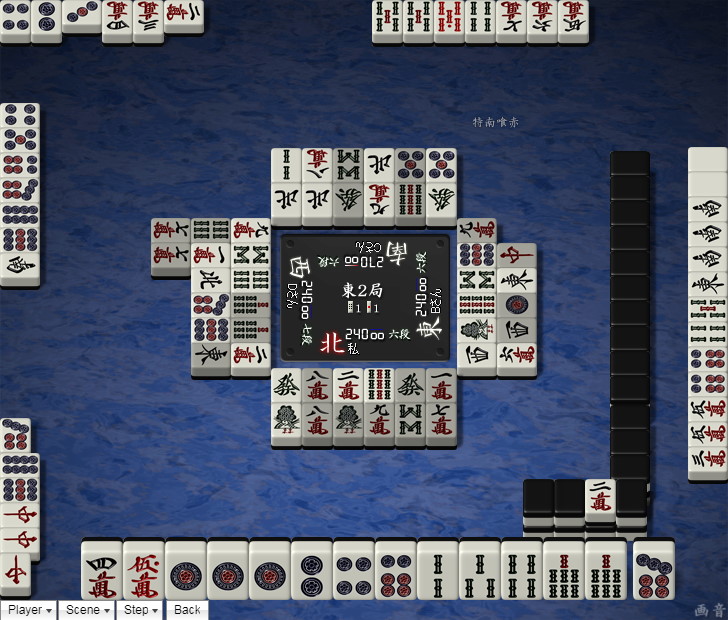
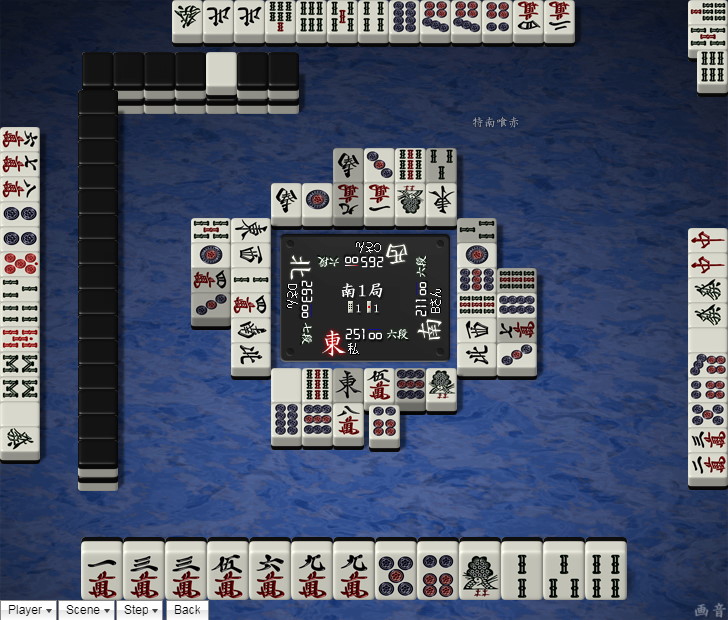
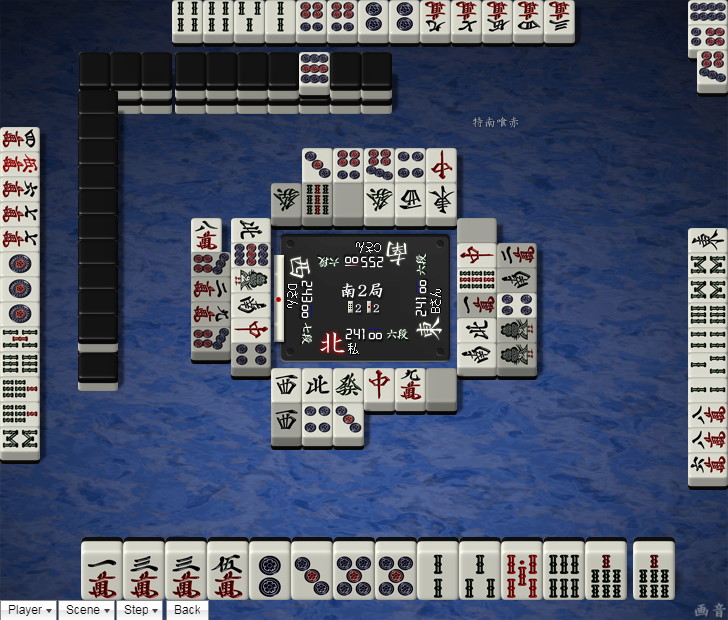
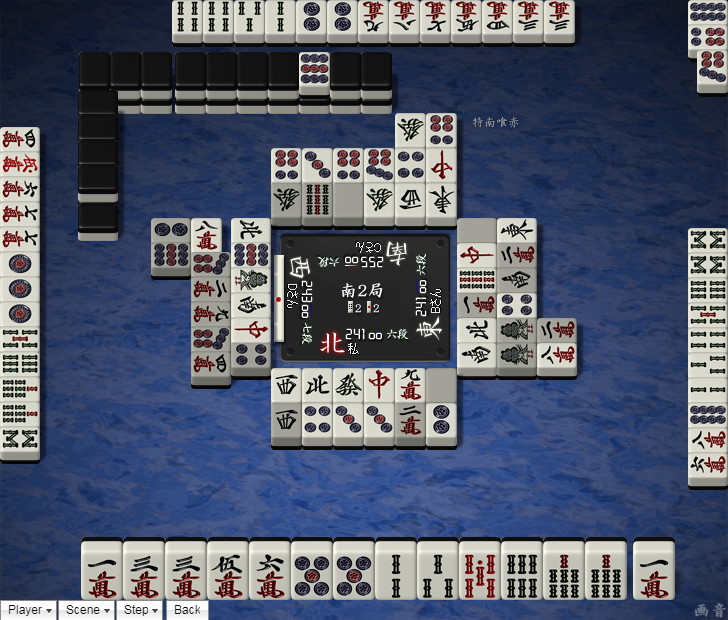
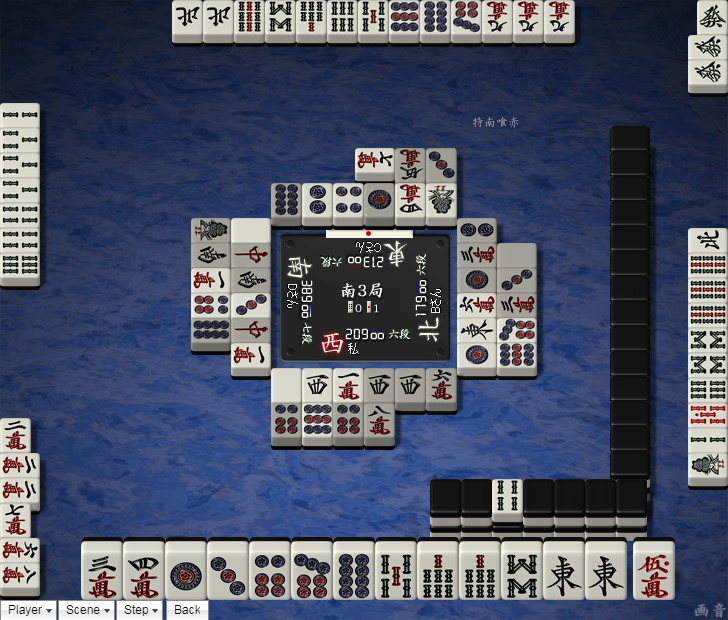
E1-0
A quiet start to the game, but we’ve already hit a turning point. The most straightforward option here would be to discard  , leaving my five blocks as
 –
–

 –
–

 –
–
 –
–
 , however that puts me into a pairless ryanshanten. The pinzu shape could eventually evolve to something like
  or but the penchan will still be the bottleneck, so I figure it’s better to take this opportunity to break it up now, and look to form my pair with the nobetan or, if I’m lucky, a
  sanmentan. My hand currently has no value, so I have to prioritise good shape.
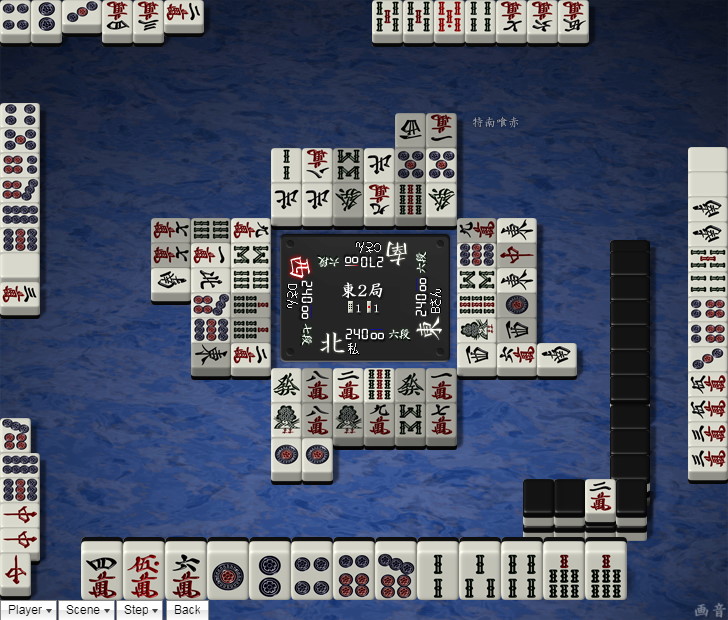
A backfire. I could forcibly drop the furiten ryanmen now, but there are still five  I could draw to recover, and even if I end up with a furiten pinfu riichi, that’s not so bad either. On the other hand, given that there are now three visible, so it’s better to discard here. That means the pinzu shape can longer form a aryanmen, but the kanchan maintains the dora ukeire, so really I’m only losing 1 x and 2 x as ukeire.

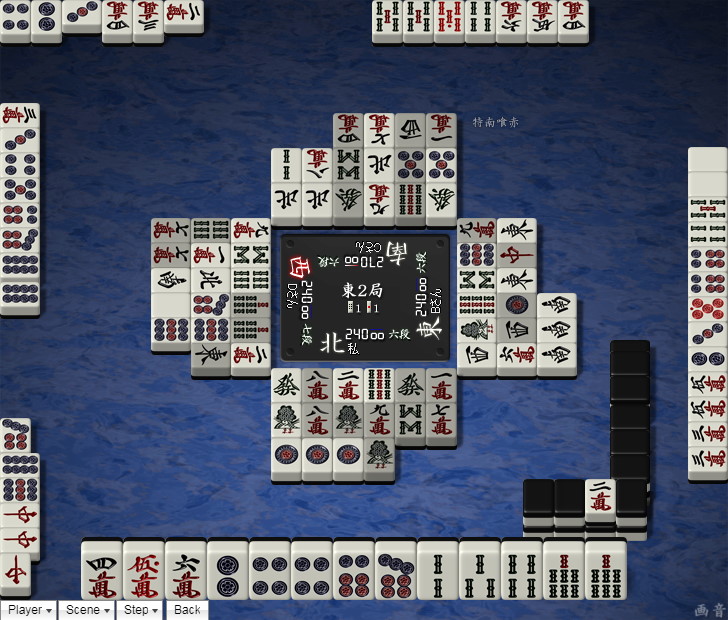
Toimen’s riichi puts me in a spot of trouble since I don’t have many safe tiles. However, pairing here means I don’t need to hold onto the nobetan, so I can discard the safe and wait and see how things play out. If kamicha discards another genbutsu, I can chii for tanyao tenpai. Although pushing a 1500 point hand against a riichi is risky, I’d have a ryanmen wait, and it might be better to try and end the round myself rather than trying to defend. Besides, since I’m the dealer, I lose more points anyway if I just sit back and let him tsumo.
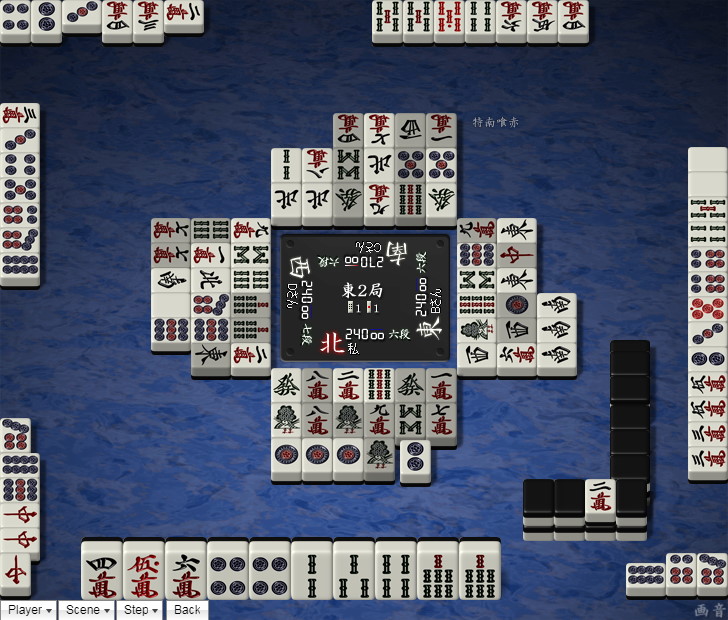
Drawing the dora here is a devilish temptation. If I want to defend, I can only discard , which would mean abandoning any chance of winning this hand. It’s only the middle of the round, so there’s still plenty of time for toimen to tsumo, and I want to avoid that. There are also only seven suji out ( –
– –––
––– ––
–– ), so there’s room to continue moving forward, in which case I’ll need to drop a block – I can discard for headless iishanten, but that’s a completely live tile, and unless I draw
  or I’d end up with either a tanki wait or a furiten wait, neither of which I can justify pushing against a riichi for. In hindsight, I should’ve discarded as there are only two remaining – I didn’t notice this at the time – and it’s also one chance, so it’d be safer. Instead, I opted to discard the furiten souzu ryanmen here, because sobaten (that is, tenpai in the area near the riichi discard) is actually less likely than most people think, particularly with an early riichi. In hindsight, perhaps I should’ve noticed that he discarded the safe
  from his hand right before calling riichi, meaning that he had drawn a more useful tile. In that case, it’s much more likely that he has a good wait, and the probability of sobaten around also increases. As it turns out, would deal in, but luckily I chose to start with here.

We’re nearing the end of the round, so there’s less worry of toimen getting a tsumo now. However we’re up to nine suji out, and both 
 and are live, so I can’t push this . is now suji, so let’s discard that for now. If I’m lucky, will become safe and I’ll be able to reach tenpai before the round ends.
There’s a suspicious lack of lower souzu in the pond and I can’t discount the possibility of a typical suji trap waiting on . Time to betaori with .
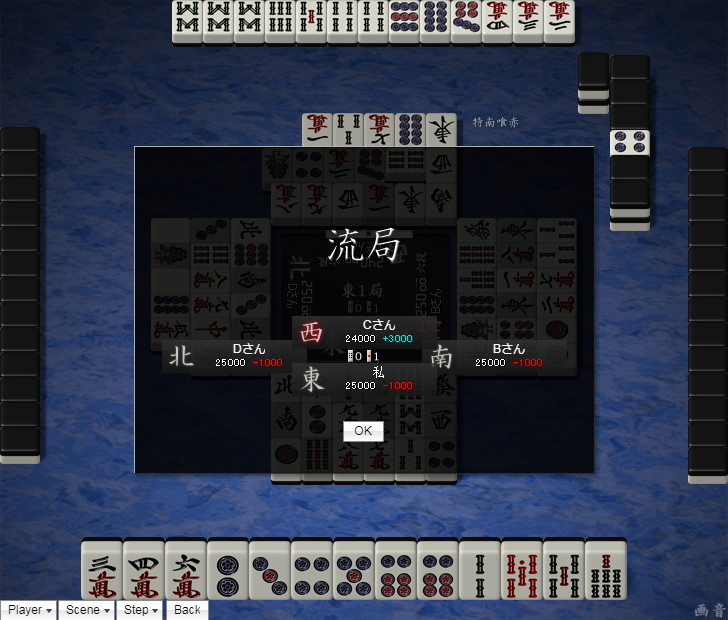
I safely manage to fold out the rest of the hand. I check toimen’s wait and breathe a sigh of relief that I narrowly avoided discarding , then a sigh of confusion as I realise that, from  , he could instead have discarded to wait on . Maybe this guy’s not very good.
E2-1
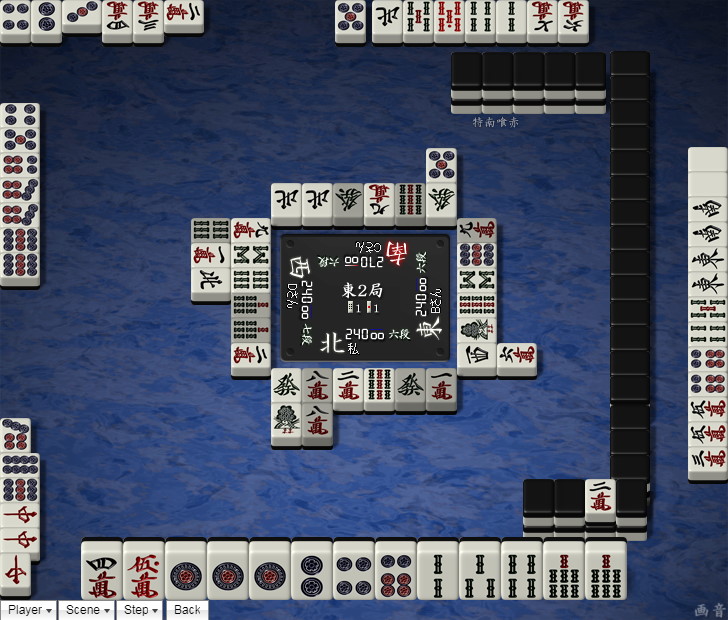
Nothing too interesting going on with my hand in this round, but toimen makes two quick calls hinting possible sanshoku with at least one dora. Given that he dropped a pair of  , it’s highly likely he’s actually going for tanyao, and sanshoku would probably just be a bonus. Interestingly, he decides to hold onto the third as a safe tile and discard against kamicha’s very obvious honitsu. Since there haven’t been any pinzu overflow yet, perhaps he thinks kamicha isn’t tenpai yet, so he wants to force through while he still can.
For his part, kamicha interestingly decides not to chii with to widen his wait to , perhaps to try and camouflage his honitsu. I think it’s a bit late for that really, but he ends up drawing  anyway for the ideal
  sanmenchan.
He draws the  and for some reason decides to break up his sanmenchan and wait on the tanki. Maybe he’s suspicious that is live and that it’s toimen’s wind, or maybe he just wanted to try and disguise his honitsu even a little bit more. Meanwhile, toimen has hit tenpai.
Interestingly, shimocha’s not scared of dropping and kamicha’s not scared of dropping  . I suppose he thinks both and are just as dangerous against toimen, but he can’t bring himself to break up his honitsu, so he probably figured he’d have better odds of winning if he waited on a guest wind rather than the round wind. Shimocha opts to stick with his chiitoitsu iishanten rather than taking the double yakuhai pon because his hand is too full of dangerous tiles and he has no other way to hold onto them.
Shimocha draws a third and follows kamicha in discarding . It’s a nice dodge – had he kept going with his chiitoitsu he’d have dealt in. He probably felt it was the safest way to move forward. It’s interesting that he changes tack after pushing only the previous turn though.
Toimen decides it’s getting late and so he should give up on sanshoku to maximise his chances of winning the hand and stopping kamicha.
Under normal circumstances you’d break up the kanchan here, but that’s too dangerous here. is safe, but I’d also have to discard either or in order to take tenpai. passed a few turns ago, and kamicha’s hand hasn’t changed since then, and given his discard I’m quite confident that toimen is just going for tanyao now, so I decide to break up my ankou. I can mawashi towards a tanyao of my own, and even if that doesn’t pan out, I’ll be a few turns closer to reaching the end of the round safely.

Kamicha now decides to hold onto  rather than . Did he make the same read as me that toimen is going for tanyao, or did my discard make him wary that I might be waiting on ?
My second drop and shimocha’s drop makes it clear to kamicha that is safe, or at least safer than the live dora .
Kamicha draws another and decides to discard the one in his hand rather than the one he just draw, probably trying to bluff that he’s defending. Either way is fine for me, I can chii for tenpai so I don’t need to pay the noten penalty.
In hindsight discarding after the chii would’ve been the safer way to take tenpai as it was nakasuji to both toimen and kamicha and it was safe against shanpon, but instead I ended up discarding as it was suji to toimen and kamicha hadn’t called on it at the time. Fortunately it passes and we safely come to an exhaustive draw.
E3-2
Just when I get a slightly good starting hand, kamicha’s is even better. I’m tempted to chii his but my hand is too far away and too cheap to justify going all out just yet, so I decide to drop my pair and wait and see.
I was hoping that two turns of safety would buy me some time to get more safe tiles, but to no avail. It’s decision time – if I want to fold, I can either discard the half suji, or I can discard and take the chance that an early riichi isn’t sobaten as discussed earlier. If I want to push a little, my options are either or – between these, forms a useful ryankan if I draw , while protects me from backfiring on draws. also has the bonus that becomes nakasuji if it passes, so it becomes easier for me to defend.
Whoops, didn’t notice that had just passed.
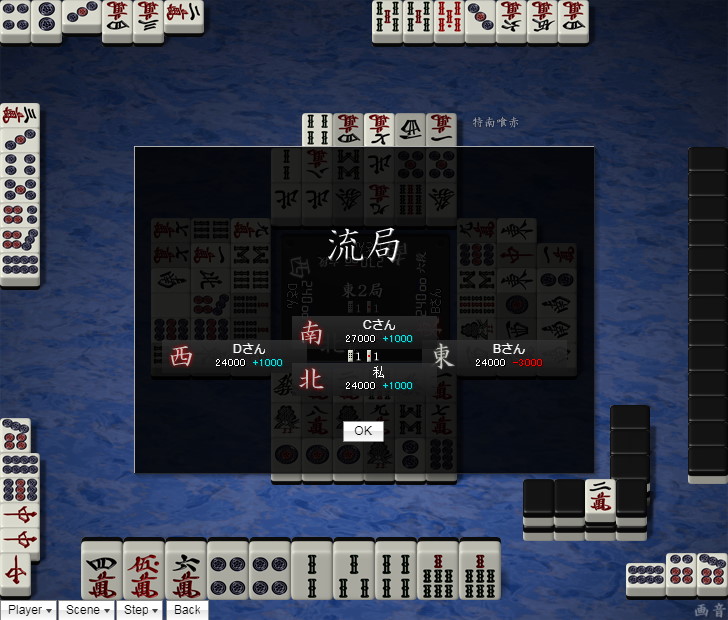
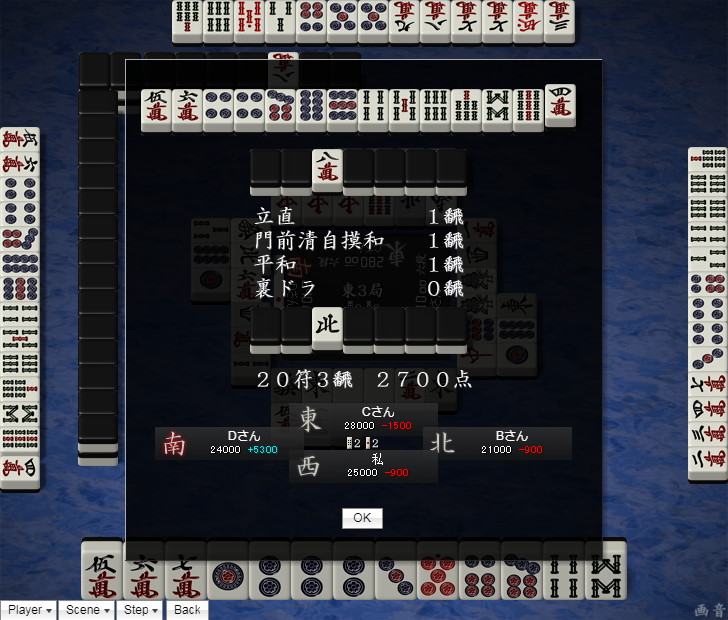
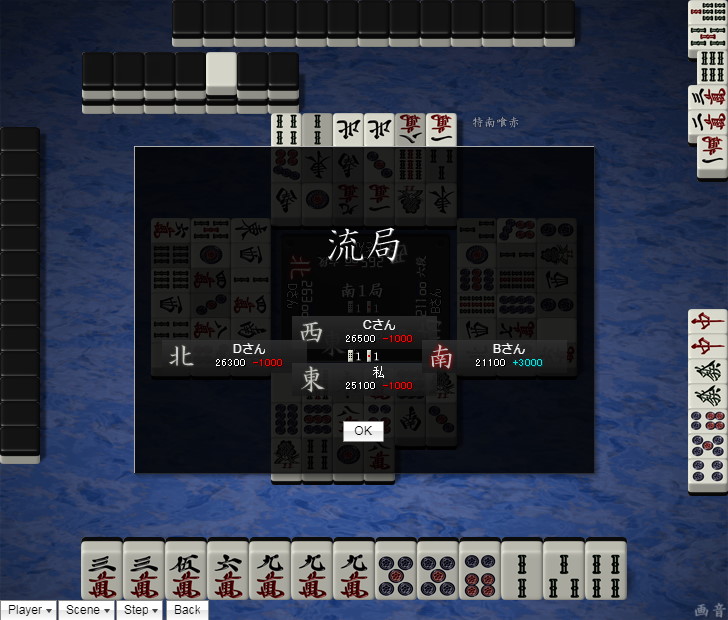
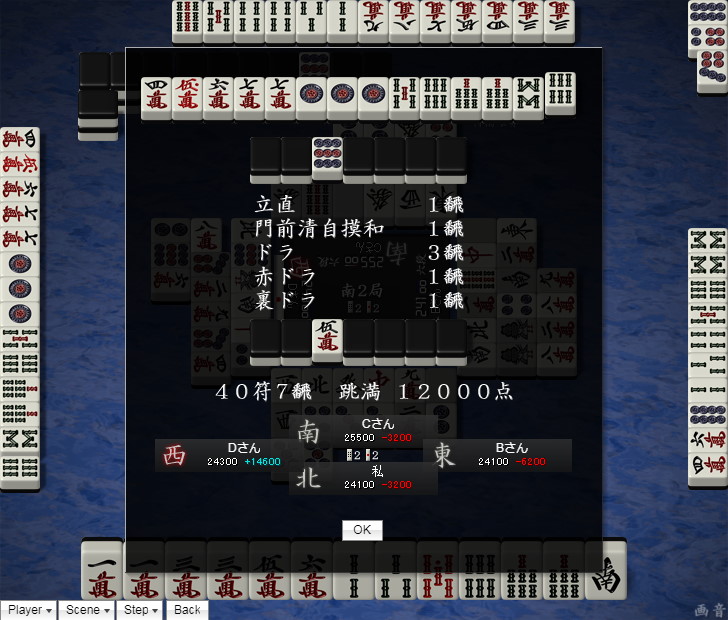
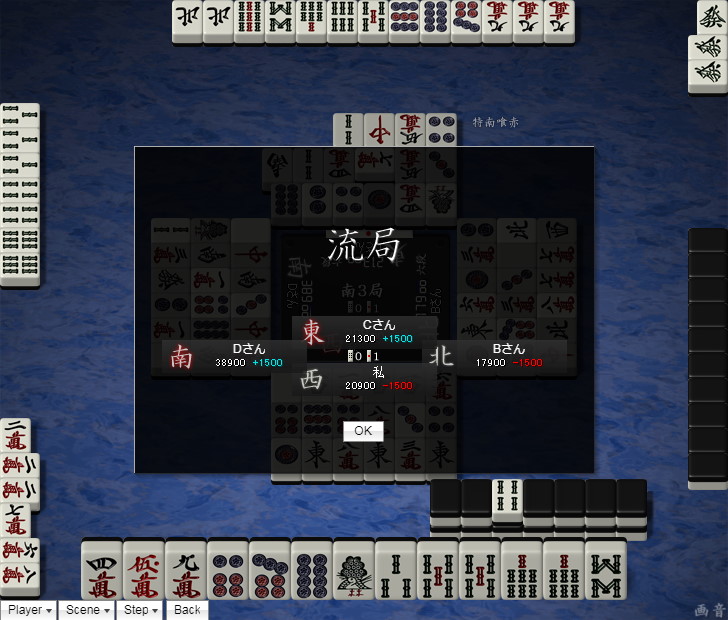
Fortunately I draw right away, but before I can get any further, kamicha tsumos. It’s only 2700, but including the riichi sticks and honba it’s a rather sizable hand, especially given how defensive this game has been so far. Even a lead that small won’t be easy to overturn.
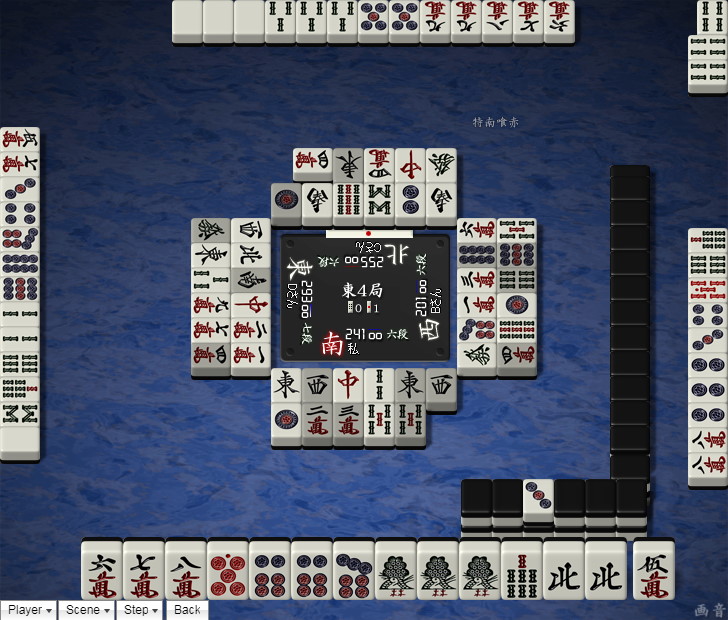
E4-0
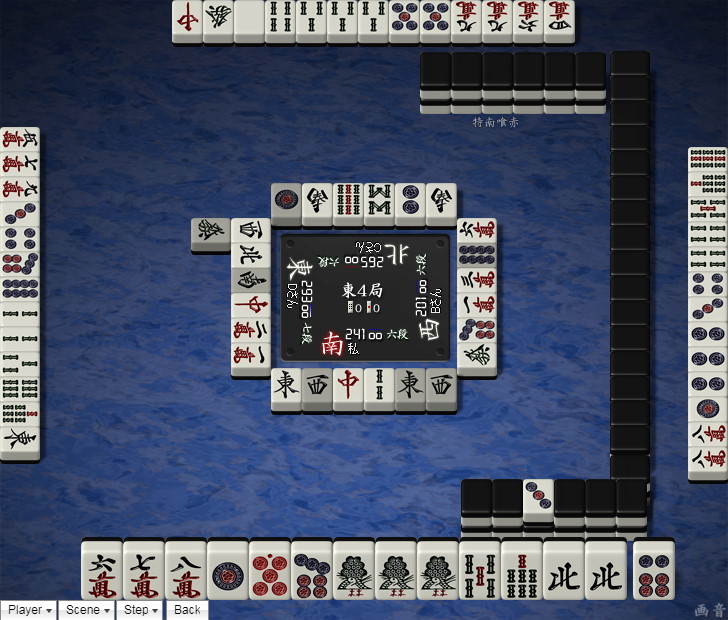
Although kanchan dora is usually a textbook riichi, I’m reluctant to take it this time because I know these guys are tight and my chances of winning aren’t great. gives me sanshoku, gives me another dora, and give me a ryanmen wait, so I decide to dama and hope for the best.
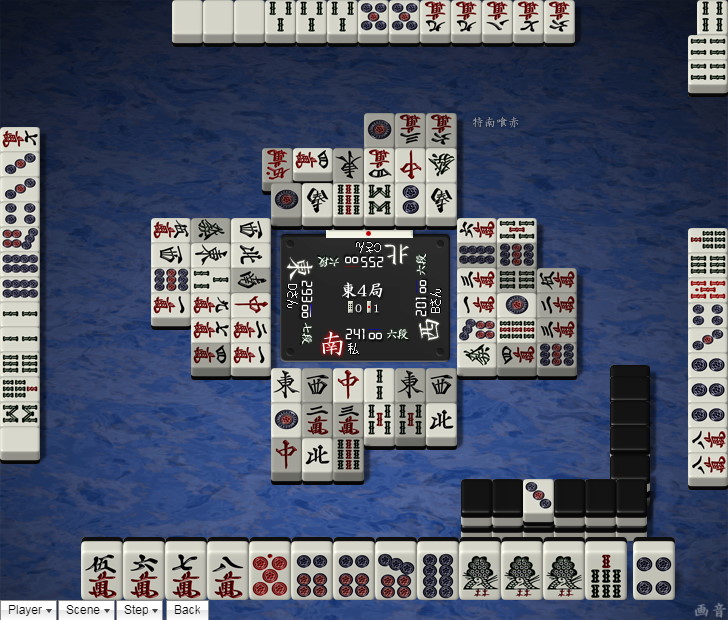
That pon makes it harder to improve my souzu shape, and now there’s one less to win with, so I decide to change my plan and break up the souzu kanchan in favour of developing a good shape pinzu wait incorporating the dora.
It’s too late now that there’s a riichi on the board, but there’s my would-be sanshoku. Let’s drop and see how things go.

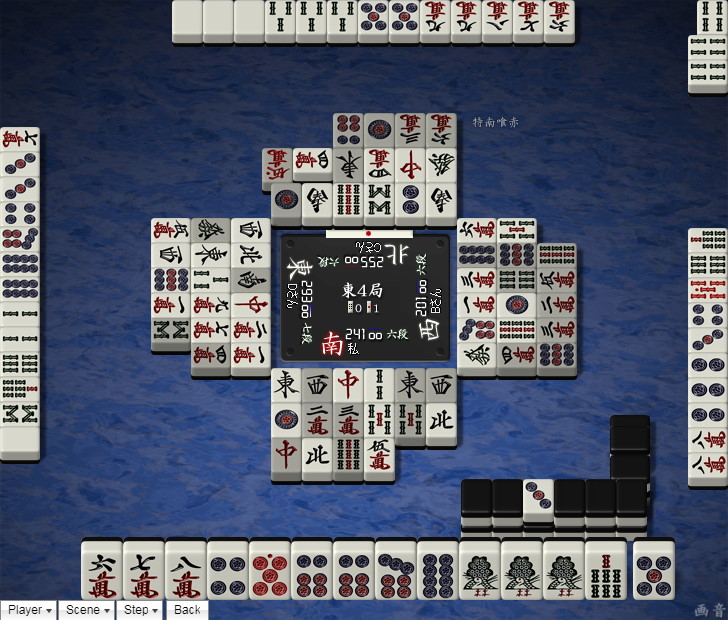
I probably should’ve just discarded here as that’s the most efficient choice, but the nobetan still has four tiles left compared to three for the souzu kanchan, and I can’t risk pushing if I draw (or  if I draw ) so the pinzu shape isn’t actually as flexible as it looks. I decide to proceed with caution and discard .
Tenpai, but now is dead so the nobetan is really just a tanki. If I’m going to be waiting on suji either way, it’s better to do so by discarding genbutsu, so I discard to wait on . My usual instinct would be to discard to give out less information compared to discarding a tile closer to the middle, but thankfully I caught myself and managed to avoid dealing into shimocha.
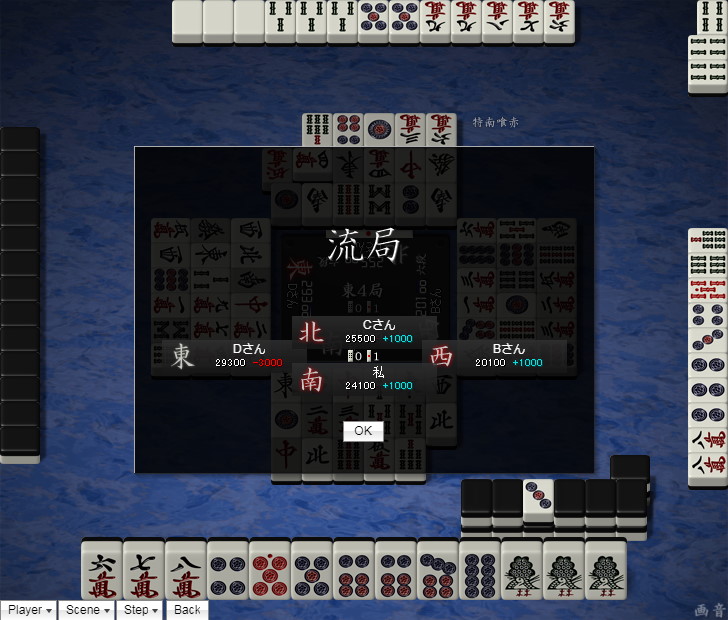
Discarding would be double ron, but fortunately I can maintain tenpai by discarding the suji now. We safely reach another exhaustive draw.
S1-1
I would’ve liked to make better use of my dealer turn but this hand has been a mess for me. I had originally been hoping for ittsuu but with the dora  still unseen and my hand going nowhere, it’s best not to overdo it. Shimocha’s -> discards suggest he had but it’s hard to know whether he’s now waiting on or if that shape is already complete. However I noticed a call lag when I discarded this which told me that his pinzu shape was complete. Given the discards he most likely has no other pinzu, meaning that all pinzu are safe against him and the danger areas lie elsewhere.
Discarding from his hand means he must’ve had and drew . This is called a “slide”. Toimen and kamicha both followed suit by discarding , and kamicha also discarded right away, so he’s most likely out of the running for this round, but toimen pushed the dangerous . He hasn’t called riichi yet but he must be iishanten. I decide to take this chance to cut my own while it’s safe against shimocha, but he calls chii for tenpai.

all look like they could come out, and I know will pass if either of them overflow, so I decide to discard  here and hope for the chance to take tenpai. Given shimocha’s early discard and tsumogiri, looks safe enough. Unfortunately I don’t get the chance to call for tenpai so we come to yet another exhaustive draw.
S2-2
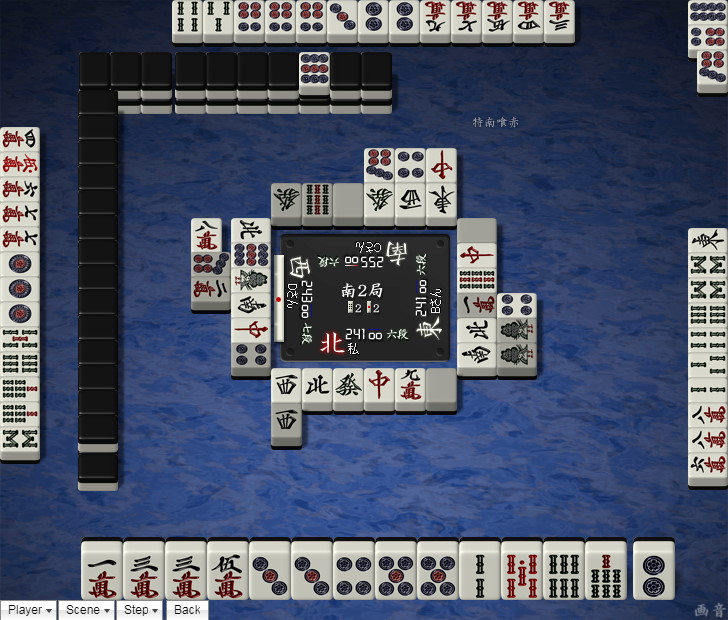
This hand had potential but it’s too far away and has too many bad shapes to justify taking too many risks against kamicha’s riichi. I could try and mawashi a little by discarding the nakasuji , but it’s possible that from he chose to wait on for the chance at akadora to give him a more decisive lead, especially if he thinks the players at this table are too defensive and wouldn’t fall for a normal moro hikkake suji trap anyway. In any case, I have no choice but to discard my only genbutsu here.

There’s a kabe, so the next safest discards are . Between the two, is less likely to deal into shanpon or tanki, and in the first place if he had he would’ve discarded instead to lock in the ryanmen. On the other hand, discarding from isn’t inconceivable. If I discard I can also incorporate the dora into my hand and maintain the chance for sanshoku.
No way I can discard . Betaori time.
is the safest choice here as it only deals into tanki, but I didn’t notice at the time since I was too mentally occupied with calculating how safe was. Kabe on all of meant a wait would be shanpon or tanki only, and just like with , neither of those shapes make sense with kamicha’s earlier discard. With that in mind, I discarded . Kamicha proceeded to tsumo for haneman, finally blowing the lid on this close game.
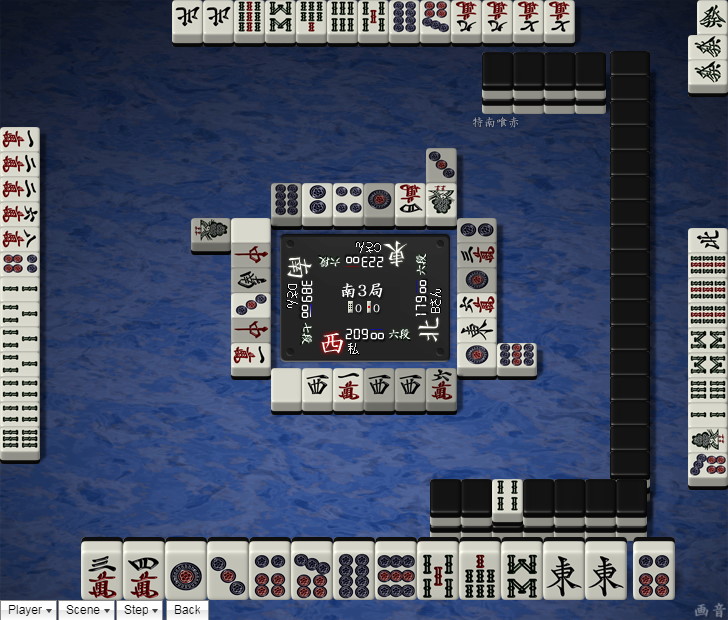
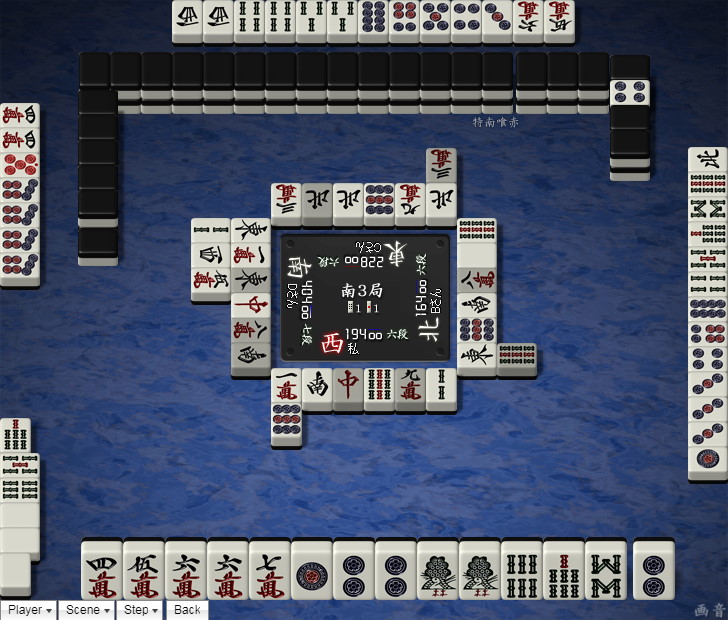
S3-0
It’s a fight for second and third now. I don’t want to let shimocha call the dora , and given all those lower pinzu discards I know the remaining two are almost certainly still in the wall, so I tsumogiri and hope to be able to work the dora into my hand. I can still utilise as a floating tile and switch out the kanchan if I draw .

Kamicha makes two lightning calls that hint at honitsu, but given the came out right after the pon, it looks more like just tanyao, trying to close the game out before anyone can mount a comeback. Toimen’s passed, and I don’t really expect kamicha to have called that first chii from a shape like , so this looks safe enough to tsumogiri.
A dealer riichi brings the game to a boil. I can safely discard , and hope to draw for dama pinfu to try and snatch second.
still looks quite safe – it’s the third one, so shanpon is out. It’s suji to , so ryanmen is out. Kanchan doesn’t make much sense given that toimen has discarded two – if he had to begin with, he would’ve discarded , and if he drew into later it doesn’t make sense either for him to have kept that shape as is given his earlier discard. However, despite everything, a random wait is still technically possible, and even if I reach tenpai my souzu shape will overflow, so I decided to drop the pair instead. Given that the souzu shape is too dangerous to touch anyway, I probably should’ve just gone for complete betaori here. In the end, we came to yet another exhaustive draw.
S3-1
It’s the moment of truth now, sink or swim. This would be an easy riichi in a flat point situation in east round, but with such close scores in S3 and with one person with two calls, it’s a lot harder. However I don’t have time to try and force tanyao here, and even if I sit back and hope for kamicha to move us on to S4, the point situation is too precarious. On the other hand, looks good in the wall, and tsumo puts me in second. It will also be difficult for toimen or shimocha to push against me given the current scores, and there’s a chance that kamicha might even try to deal in, so I ultimately decide to riichi.
I manage to tsumo the akadora  to slide into a tight second place going into S4.
S4-0
There’s not much point in me trying to go for the win too aggressively here, so I want to hold onto this  as a safe tile. My ultimate goal would be dama tanyao or pinfu, so I decide to drop the manzu penchan. I discard first as will be slightly safer to discard later.
I still want to hold onto as a safe tile so I have to choose a block to drop. For either tanyao or pinfu, or has to go. Given toimen and shimocha’s discards, looks somewhat safer to hold onto, so I opt to discard .
Toimen reaches yakuless tenpai but decides he can’t afford to risk calling riichi. It’s not big enough to overtake me anyway, so he’s content to tsumo to secure third, or if he gets the chance, he’d probably pon and switch to a manzu nobetan.
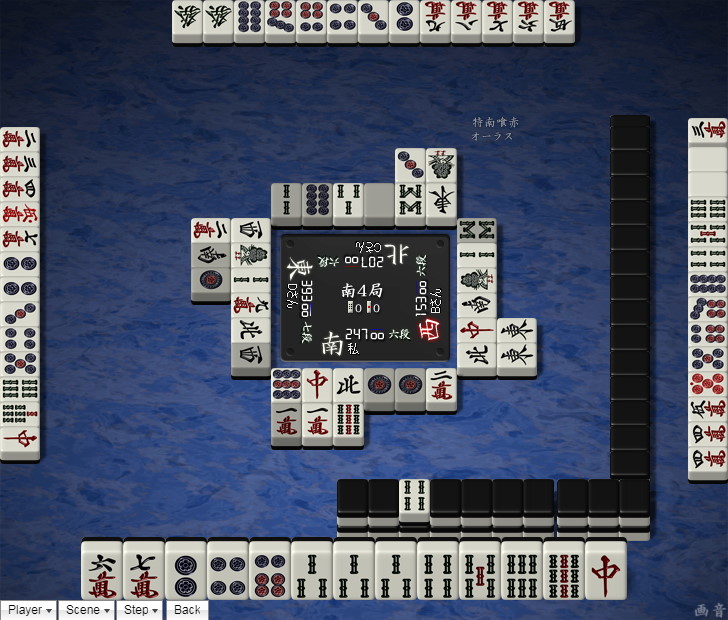
Last place also reaches tenpai immediately after. Haku with two dora isn’t enough to escape last without either tsumo or a direct hit on me or toimen, and there’s already one out, so he decides to riichi. Toimen unfortunately has no yaku so he can’t ron the overflowing .

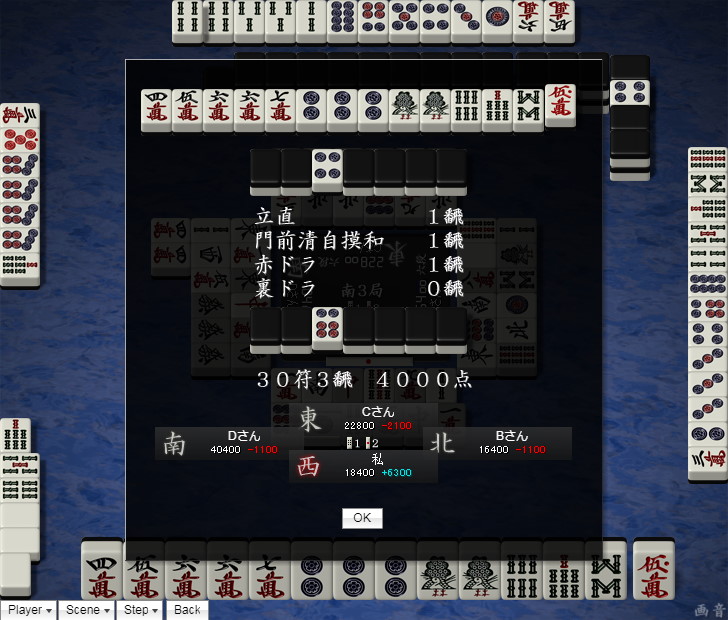
In a cruel twist of fate, toimen draws the fateful on the ippatsu turn. He can’t sit back and defend as that would mean waiting for last place to overtake him, so he has no choice to push, walking headlong into his own destruction. Toimen gets his riichi ippatsu haku with two dora – if he hits ura dora, he jumps up to second at my expense. I pray for the best…
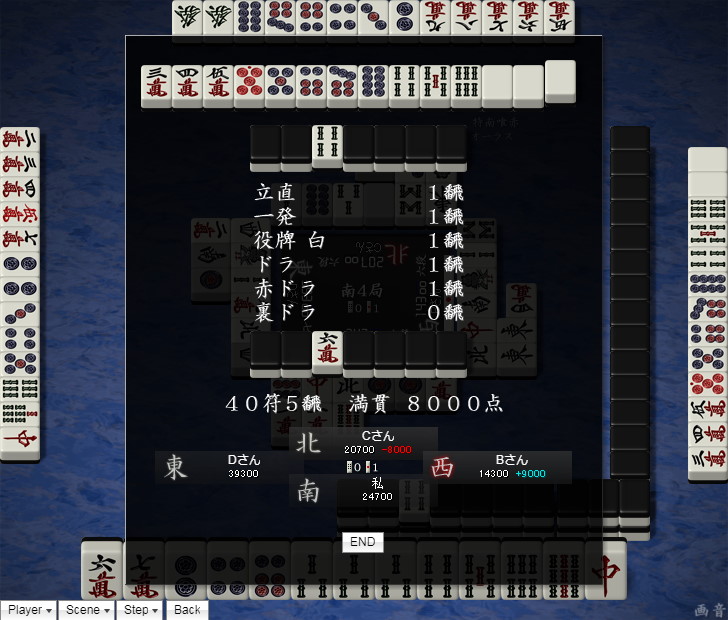
And my prayers are answered.
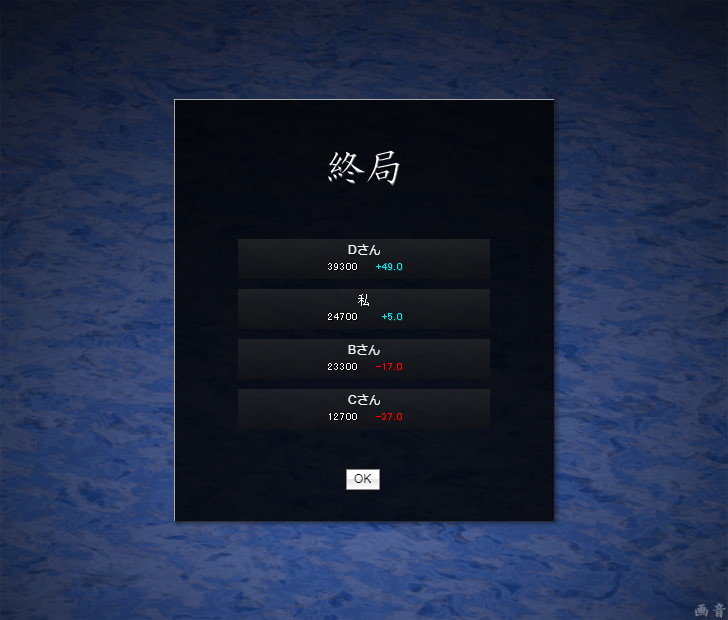
This was one of the most intense games I’ve had in recent memory and when I reviewed the replay I felt it was, despite the many mistakes and questionable choices made by all parties (myself included), a rather high level game, ripe with potential learning opportunities. The main takeaways I’d suggest for those 5-6d players who may be struggling in tokujou would be:
- Be patient and wait for your chance. You don’t have to try and force a win in every hand.
- Understand the thresholds of push/fold judgment. If you can still see a safe path to tenpai, try to keep it open, and don’t needlessly break up your hand prematurely. Once you see that path has closed, betaori with no regrets. That’s what effective mawashi uchi is all about – it’s not about recklessly pushing half dangerous tiles for no reason.
- Watch what your opponents are doing. Are they pushing or are they folding? This is valuable information that will tell you how dangerous the situation really is.
If you have any other thoughts, ideas, or questions, we’d love to hear them. As always, the comments are open!